Getting started with Runecast Analyzer REST API
Runecast Analyzer 1.5.4.0 was released on June 13, right before the VMUG UserCon in Frankfurt, Germany. It includes minor bug fixes, added new KB definitions, improved Best Practices and Security Hardening checks and a feature which was requested by many of our customers – API. In this article, I’m going to show how you can perform REST request to Runecast Analyzer from vRO.
Prerequisites:
- Runecast Analyzer 1.5.4.0 or above
- vRO
Each REST request against Runecast Analyzer must be authenticated. For this purpose, an access token is required and can be generated via the user interface. Go to Settings -> API Access tokens and select "Generate API access token". Provide description (optional, but preferred) and once you click on "Generate", your access token will be ready. Make sure to copy it, as you’ll not be able to see the same token again. Now we will be able to authorize our requests.
But what we can get from Runecast Analyzer via the API? You can find the available REST operations in well-organized swagger format. You can even test your requests right from the Runecast Analyzer user interface. The response is in JSON format and you can find the structure from the documentation as well. While on the API Access tokens page, just follow the "Runecast API" link. As it’s using the same session where you are already authenticated, you don’t have to include the token in the header of your requests.

Now let’s switch to vRO. I’m using vRO 7.3, but the ability to perform REST requests is not new in vRO/vCO. First things first, we need to add Runecast Analyzer as HTTP-REST host. vRO has built-in workflow that will help with that. On the workflow view, navigate to Library -> HTTP-REST -> Configuration and run the “Add a REST host” workflow. Most of the fields are pretty standard so I’ll highlight just a few:
URL – in the format https://RCAnalyzerIPorFQDN/rc2/api/v1
Authentication type – None. We will be including our token in the header later on
Proxy Settings – depending on your infrastructure
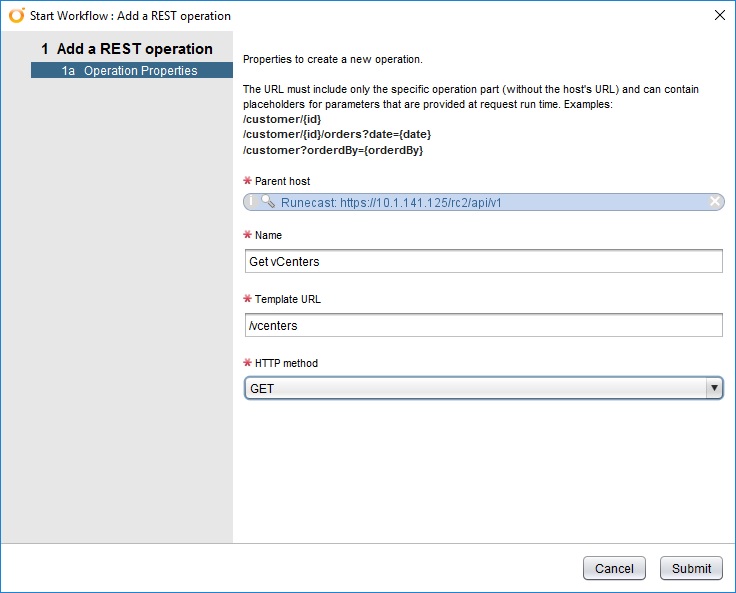
After successful completion, you should be able to see Runecast Analyzer in the Inventory view under HTTP-REST. Next, we need to add a REST Operation. This is being done via built-in workflow called “Add a REST operation”. You’ll need to provide REST host (which we just added), name of the operation, URL and the HTTP method. Last two settings can be gathered from the swagger UI that we covered earlier in the article. Let’s start with something simple – GET request to retrieve the vCenter Servers which are registered in Runecast Analyzer.

Next step would be to create workflows for those REST operations. Luckily, there is a built-in workflow doing just that called “Generate a new workflow form a REST operation”. We need just to select a REST operation and provide name for the workflow.
We agreed that we’ll be including the authentication token in each REST request. Now it’s the right time to set this up. Open the workflow generated from a REST operation and select the Scriptable task. By default you will find the following comment there:
//Customize the request here
//request.setHeader("headerName", "headerValue");
We need to uncomment second line and add our input:
request.setHeader("Authorization", “tokenValue”);
At this point we are ready to submit our first request.

In the Logs section you can review the result of the workflow. We see response code of 200 which means that our request was successful and, right after it, you can see the content of the response.
Well done! You’ve made your first steps in leveraging the Runecast Analyzer REST API. What use case you can come up with? Tweet us using the #RunecastAPI hashtag and share.
Ivaylo Ivanov, VMware Engineer
